

Schenker Tech Class is a series of articles and videos by “Cruise RO Rich”: 
This series is intended to help Schenker watermaker owners better understand how their watermakers work and to review best practices for maintaining, servicing and troubleshooting their watermaker.
If you have a topic you would like to see covered, just email your request to [email protected]
Subscribe to the class – every time a new class is posted you will be notified.
SCHENKER WATERMAKER TECH CLASS SERIES:
+/- Schenker Tech Class 7: New Class Coming Soon:
+/- Schenker Tech Class 6: Proper Prefilter Change-out Procedure
Schenker Tech Class 6: Proper Prefilter Changeout Procedure
I know it sounds like a simple thing to change out the 5-micron prefilter on a Schenker Watermaker.
- Unscrew the filter bowl
- Replace the old filter with a new one
- Screw back on the filter bowl
What’s so difficult about that to warrant a tech class topic?
Many things in life that seem easy and straightforward can in fact be easy. However, there is a somewhat obvious and often overlooked important detail to a prefilter change that needs to be addressed to save you from a potentially costly mistake. One like I was dealing with today…😳
The 5-micron prefilter is protecting the RO Membrane and Energy Recovery Pump from solids larger than 5-microns in size. Solids smaller than 5-microns just pass through the Energy Recovery Pump and flow out of the RO Membrane with the brine discharge. But solids larger than 5-microns can get lodged in the RO Membrane spiral wound matrix and literally plug up the RO Membrane, reducing product water production and actually increasing the PPM of the product water. There is something even worse than a plugged-up membrane and that is scratched up seals, cylinders, and internal working surfaces of the Energy Recovery Pump. If the internal seals and working surfaces of your Energy Recovery Pump get damaged, it’s time for a rebuild. Now of course that’s something I believe an average cruiser can do with good tech support and I’ve done it many times on WhatsApp over Starlink (like today). But do you carry all the spare seals and parts aboard that could be damaged? Maybe…maybe not. So an ounce of prevention here can go a long way.
Firstly, you never run water from any source into your Energy Recovery Pump without a 5-Micron prefilter in place. Not fresh water, not membrane cleaning reagents, not pickling reagents, nothing. Anytime water is flowing into your Energy Recovery Pump, you must have the protection of the 5-micron prefilter.
Now let’s address how a simple prefilter change can go horribly wrong. Your 5-micron prefilter is working great, doing what it should be doing and you are happily making water for the long showers Rich promised you if you had a watermaker aboard. Life is good, until…
Scenario 1:
You got into shallow waters and while you may not admit it at the cruiser bar, you may have gently bumped the soft sandy bottom a bit, but no harm, no foul. Your watermaker was running at the time and some of that sandy bottom was stirred up and was sucked into the watermaker through hull. No worry however, your 5-micron prefilter did its job and filtered out the sand.
Scenario 2:
You usually only like to run the watermaker in clean blue water, but because your non-boater friends came for a visit and used water in the shower like it was…well Water…you now need to run your watermaker in the less than clear water anchorage. The water looks pretty turbid actually and you can’t see the 20ft bottom, but oh well…you make water. Again your 5-micron prefilter does its job filtering out some decent size chunks and bits.
Scenario 3:
While making water you noticed a change in sound from your feed pump and upon investigation found that your raw water strainer was completely clogged with gunk of unbelievable funky smell and lots of small bits of shells. Who knows how those shells got in there, but you clean it all out and start making water again. But during the process of cleaning out the raw water filter screen in the galley sink (and getting in trouble with the Admiral for doing yet another smelly job in the galley) some of those solid bits get pushed through the screen and sit on the outlet flow side of the filter screen, so that when you restart the watermaker, down those bits go into the 5-micron prefilter.
Scenario 4:
It’s time to layup the boat for summer storage and pickle the watermaker. So out comes the SC1 and 5-gallon bucket from the aft deck to mix up the picking reagent. Well the bucket was last used to hold a few lobsters as you prepared the BBQ but you are in a hurry and don’t give the bucket a good fresh water rinse, besides you are low on water and are running late to catch that flight home. So the sand and lobster shell bits from the pickling bucket get sucked into the watermaker along with the pickling reagent. The watermakers pickled and off you go, returning 4 months later in the fall. Thankfully the 5-micron prefilter again saved you and removed the solid bits before they went into the Energy Recovery Pump and Membrane.
In all 4 scenarios, the 5–micron prefilter did exactly what it’s designed to do…then comes disaster.
t’s time to change the 5-micron prefilter. This time you promise yourself that you are not going to lose the filter canister o-ring overboard when you dump the filter bowl water overboard. You are also convince yourself that you are not going to spill seawater on the Victron inverter charger like 2yrs and $1500 ago. So you carefully unscrew the filter bowl, and without spilling and drop slide the old filter element up and out and slide the new filter element in. Screw on the bowl and boom….off you go to recommission the watermaker. Unfortunately some of the sand, shells, and lobster bits that were safety filtered out by the 5-micron prefilter fell to the bottom of the filter bowl during the filter element swap. What was once safety on the Outside of the 5-micron prefilter is now dangerously on the inside with a direct path to the seals, cylinders and working surfaces of your Energy Recovery Pump. 🤯
During the troubleshooting process for sporadic and asymmetrical pressure pulsations, Rich walks you through checking some internal parts and Holy Toledo, scratches and gouges are everywhere. What happened…how can this be…isn’t this covered under warranty (uh No).
I know Prefilter changes sound easy, they are. But as this story thumb-typed at 40,000ft over the Baja Mexico Peninsula points out, missing little details of simple things can cause big problem. Make sure your 5-micron filter bowl is clean and never run water into your watermaker without the 5-micron prefilter installed.
Cheers
Rich-Schenker USA
+/- Schenker Tech Class 5: The Doomsday Switch (aka The Bypass Switch)
As a KISS GUY “Keep It Simple Stupid”, I must admit that I like being able to start, stop and control the watermaker from the comfort of the chart table. While cruising with my Cruise RO Piston Pump watermaker, I had to crawl into cockpit lazarette to manually adjust system pressures at the start and stop of each run. But my body just doesn’t get into and out of that locker as easily as I once did. So I’ve grown to appreciate the simple push button on/off controls of the Schenker Basic panel and every time I commission a Schenker with a Touch Screen control panel, it just puts a smile on my face at the ease of operation. As a tech/data nerd, I also love seeing all the system operating data the Touch Screen control panel displays. I will even let leak out here for you tech enthusiasts that the Touch Screen panel models will soon interface with the Raymarine/Garmin/B&G/Simrad Multi-Function Displays, so even more data and ease of operation is coming.
Electronics are great, but what happens if they Fail? Do you lose the ability to make water if a Touch Screen, Circuit Board or MFD goes out in the middle of no-where? That’s what we will be addressing in today Schenker Tech Class, what I like to call “The Doomsday Switch”.
Now the Schenker team in Italy officially calls this the “Bypass Switch” inside the electrical control box and may not like my renaming it in such dramatic terms, but I think my name is more memorable if that “Doomsday” scenario of an electronic failure was to ever happen with your watermaker controls.
Since Schenker watermakers don’t require any user pressure adjustment, all the watermaker needs to make water in a bare bones form is a working: Feed Pump, ERS, 5-Micron Prefilter and Accumulator. As convenient and cool as all the system controls are to automating the watermaker and making it easy to run and maintain, you can bypass all of the system controls (hence the more professional name of “Bypass Switch”) and make water completely manually if you ever need to do so. The “Bypass Switch” also is used during the Pickling and Membrane cleaning process and is also quite handy when troubleshooting and venting air out of the system to keep the unit from shutting down due to an “Under Pressure Alarm”. But it also gives you an important manual back-up if you were to ever lose the system electronics.
I was recently working with a cruiser in the Bahamas who had a “water intrusion incident” that flooded the electrical control box on his ZEN30. The watermaker circuit board was fried and as we all know, getting parts to the Bahamas is a challenge, to say the least. So with a little help, the cruiser was able to run his watermaker manually, by using the Bypass Switch. He left the Bypass Switch in the on Position so that when he turned on his watermaker breaker, the Feed Pump turned on and he was able to make water.
Now, some Words of Caution about running in Bypass or “Doomsday” Mode. You have bypassed your Pressure Sensors so if there is a blockage in your ERS or watermaker plumbing lines, bad things can happen, like over pressurizing lines causing hose clamps to pop-off and spray water on your expensive Quatro 3000 Inverter/Charter (been there, done that). So when running in Bypass Mode, you MUST pay attention to the watermakers operation especially during system start-up to make sure everything is working correctly. On units with Auto Product Water Diversion to send the product water to your ships tank, the diversion valve won’t function, so you will need to re-route the product water manually to your ships tank. And finally, when running in the Bypass Mode, you lose your ability to automatically fresh water flush the watermaker at the end of the run or by using the Autoflush timer feature. So you now need to fresh water flush the watermaker manually. But this is easy because also on the control board you will find an EV Bypass Switch (or Fresh Water Flush Solenoid Bypass Switch). When you flip this switch it sends power to the solenoid valve and will fresh water flush the system for you manually with your feed pump running, just like normal.
So in the famous words of Captain Ron that we all know to be true: “If it’s gonna happen, it’s gonna happen out there boss”. But at least if it happens to your Schenker watermaker controls, you will know how to deal with it and be able to keep making water until you can get to civilization to make repairs
+/- Schenker Tech Class 4: What spare parts should you carry for a long term cruise?
Experienced cruisers know that the surest way to guarantee a part won’t break while out cruising away from “Civilization” is to carry a duplicate as spare. But there is also a second part to that cruising saying that jokes about the only way to carry enough spare parts is to keep a sister-ship in tow! So part of smart outfitting for a cruise is knowing what spares to carry and just as importantly, which parts to not consume precious storage space aboard and cruising kitty funds carrying. This can be a question with different “right answers” based on the varying needs of different cruisers. A cruiser spending 4-6 months a year on the boat in relative “civilization” can have a different looking spare parts locker than a cruiser crossing oceans or planning to spend years abroad in remote locations.
So if I was setting up my Schenker spare parts kit, what would I carry based on doing Schenker customer service for a living with cruisers around the world? Let’s look at that list, along with explaining my mindset.
First, as big as the world it, DLH shipping makes it smaller. So knowing that going in means it’s not an unrealistic expectation to be able to ship any Schenker or boat part to any port in the world in 5-7 days on the quick side to 7-14 days on the long end. Now of course there can be (usually are) Bureaucratic and Customs Drama on the receiving end and sometimes International shipping costs can be a shocker. For example, to ship a 6” cube or a 12”x12”x5” box weighing under 5lbs to Tahiti in the South Pacific, will cost about $175 in Freight/Agent fees! So that $10 5-micron prefilter element now becomes $185. Many times we will ship parts to the cruisers family and friends coming to visit for them to “mule down”, it’s just part of the Cruiser Experience.
The Must Haves:
If I was heading out cruising, I would at minimum carry the needed Consumables along with the No 1 maintenance item, the Feed Pump.
So for me, that looks like:
Qty 6 of 5-micron prefilters
Qty 2 of Activated Carbon filters
Qty 2 of the SC1 system Pickling and Scale Cleaning reagent
Qty 1 of the SC2 Organics system cleaning reagents.
At minimum a Feed Pump Head rebuild kit, and my preference is to carry a complete feed pump.
Remember, all the watermaker, “Needs” to make water is a functioning feed pump. So you can loose all of the electronics and controls and still be able to make water with a running feed pump in manual Bypass Mode. However, Lose your feed pump and you lose your watermaker.
In what I call an “Advanced Spares Kit”, for someone willing to work with a Schenker tech remotely over Email/Phone/WhatsApp, I would Cary:
Qty 1 of a ERS Pump Seals Kit
Qty 1 of a ERS Check Valve Kit
Qty 1 of a Valve Rod and Main Rod
With this “Advanced Spares Kit”, you have the ability to completely rebuild the moving parts inside the ERS Pump. I have walked cruisers through this process step-by-Step over WhatsApp. I will admit that it’s intimidating at first (it was for me as well the first time), but once you get into it, the ERS Pump really is quite a simple device. If you are patient and follow directions, you can do this yourself.
The RO Membranes.
While I frequently get asked about carrying a spare membrane, it’s something I rarely advise doing. There are two main reasons for my thinking here.
First, RO Membranes don’t typically make good water one day and then fail the next. Membranes usually degrade in performance slowly over time and that’s something you can see happening and plan for replacement.
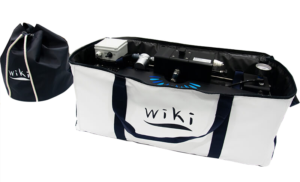
Secondly, properly storing an RO membrane on a boat isn’t easy and if you don’t, when you need your spare membrane it could be dead! Membranes have to be stored wet and below 140F. The pickling reagent inside the shipping bag easily dries out and is only good for one year.
Perhaps the Best Watermaker Spare to Cary, isn’t an actual part, but rather taking proper care of the parts you already have! It’s oftentimes a bit shocking to me the lack of proper maintenance and care some cruisers give such important and high dollar cruising gear. I can personally relate because as a cruiser myself, I’ve damaged a set of membrane (ok two) by being careless and a bit lazy about proper maintenance. Of co I had the luxury of being able to pinch a few new membranes off the shelf and call it “spoilage” from the inventory to hide the cost from my wife, you may not be so lucky.
Cheers
Rich-Schenker USA
+/- Schenker Tech Class 3: Under Pressure Alarm Troubleshooting (As indicated by 3-Rapid Panel LED Lights Flashing)
The Schenker watermakers are equipped with a pressure transducer on the outlet of the feed pump. This transducer monitors the system pressure for both Low and High Pressure. When it senses low pressure, the feed pump is cut off and the remote panel indicates an “Under Pressure Alarm” by 3-Rapid flashes of the Basic Panel button LEDs. Here are some of the most common causes for this Alarm, along with the basic troubleshooting steps to identify and fix the Alarm.
Failed Pressure Transducer?
If you are unable to clear the air from the system and are continually seeing the Under Pressure Alarm, it is unlikely that you have a failed pressure transducer. When the pressure transducers fail, they normally exhibit a “Over Pressure Alarm” (4-Rapid Flashes on the Basic Panel) vs an “Under Pressure Alarm (3-Rapid Flashes). Under Pressure Alarms are usually associated with Feed Pump or Air Bubbles issues.
Air in the System:
Remaining air in the system or air bubbles being sucked into the suction side of the feed pump are the most common cause of the Under Pressure Alarm. This can happen after the raw water strainer is opened for cleaning or if one of the inlet-side hose clamps is loose and allowing air to enter when the inlet side plumbing is under a vacuum. It can also happen after a prefilter change until the air is pushed out of the system. To clear the Alarm, press the “on/off” button and the system can be restarted. Sometimes, especially during initial commissioning or after the boat has been stored on the hard and the inlet side water lines drain, it can take 3 to 4 on/off cycles to purge the air out of the system.
Detached Hose:
If one of the sea water lines upstream of the watermaker group comes detached, the system won’t be able to build pressure, and the pressure transducer will turn off via an Under Pressure Alarm. This feature came in very handy one day when I had a low-quality hose burst while running a unit on my test bench. When the system sensed a rapid decrease in pressure below the minimum threshold, the feed pump shut off, rather than continuing to spray sea water all over my work bench.
Failed Feed Pump Diaphragm:
If the easy things have been checked, it could be that the system is unable to build pressure and will continue with a Under Pressure Alarm because there is a feed pump issue. A quick test to see if your feed pump can build pressure is known as a “Kink Test”. If you gently and SLOWLY kink the brine discharge hose with the feed pump running, while watching the system pressure gauge, you should be able to see the pressure start to rise. A healthy feed pump should be able to create 9-10-11Bar on the gauge, so as you slowly kink the brine discharge hose, you should see the pressure increase. If not, then it could be time to open up the feed pump head and verify that something isn’t inside the feed pump diaphragms or to make sure that the diaphragms themselves are not damaged. This holds true for Schenker watermakers that utilize the Procon vane pump as well as the diaphragm pumps. Now, a word of caution here: If you kink the hose too quickly and are not paying attention, you CAN cause the pressure to rise too quickly, and a hose can pop off and spray you and your nearby electrical equipment.
I have attached a photo of a failed feed pump diaphragms. You can see the diaphragm cup guides broken off from the center of the cups, which keeps the pump from being able to build pressure.
Bypassing Pressure Transducer for Testing:
I often find it easier to purge air and troubleshoot Under Pressure Alarms by bypassing the system controls and running the feed pump directly by using the “Bypass Switch” inside the electrical control box. When the feed pump is turned on directly, it bypasses the pressure transducer which can allow you to help prime and troubleshoot the system. Now, you have to be aware of two important issues to keep in mind when running the watermaker with the bypass switch.
First, you have NO Pressure Alarms and Cut-offs. So you have to pay attention and make sure to not over-pressurize the system, which can cause watermaker damage. So this isn’t something you do Willy-Nilly without paying attention to the pressure gauge.
Second, the diaphragm pumps can briefly run dry without damage. However, running the Procon vane pump dry without a positive supply of sea water being pushed into the inlet WILL DAMAGE the pump head. So if your model of watermaker has a Procon vane pump, you can NOT engage the feed pump bypass switch without a positive supply of water being fed into the pump.
Finally Remember Rule No 1 of Watermaker Troubleshooting: Ask before you make it worse!
Whenever I dive into details of watermaker troubleshooting, it’s important to remind everyone that you don’t want to make something worse! Schenker watermakers has top level customer support, so we strongly recommend that you contact a Schenker dealer/technical representative before you start taking things apart and doing troubleshooting tests. A quick discussion and review of your situation can save you time and effort in troubleshooting the problem and make sure new problems and not created in the process.
I fell a bit behind with back-to-back boat shows, but the weekly Schenker Tech Classes are archived on our website at this link:
https://cruiserservices.com/schenker-watermaker…/
Cheers
Rich Boren
Schenker USA
 —
— —
—
+/- Schenker Tech Class 2: (What happens when you hit the panel “On/Off” button?) 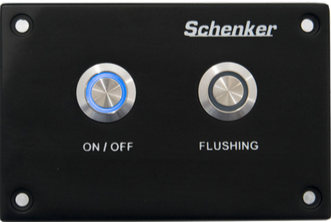
It seems obvious that a button labeled “On/Off” on the standard control panel would start and stop the watermaker and that’s certainly true, but there are some other details about this simple button worth exploring.
When you push and release the On/Off button two things actually happen.The obvious is that the feed pump turns on sending water to the energy recovery pump and membrane to start making water. But at the same time the freshwater flush solenoid electro valve (EV) opens on the activated carbon filter. The purpose of the EV opening is to help prime the feed pump and take the priming load off of either the feed pump diaphragms or the procon vane pump (depending on the model you have).
Fresh water from your ships tank is used for 5-10 seconds to help prime the lines and feed pump. So this means operationally, you should have your ships pressurized galley water turned on when you go to start the watermaker or you miss out on this system priming assist.
It also means that if you have taken on dock water that contained membrane killing chlorine, you Must always maintain a fresh activated carbon filter in your system to remove the chlorine. (Fresh is defined as less than 6 months old from the day the activated carbon filter first got wet).
In addition to simply starting and stopping the watermaker, the On/Off button is also used to activate the timed runs of 1, 2, and 3 hours. A press and release of the On/Off button starts the watermaker and it will keep running until you hit the On/Off button again OR the Flush Button. (More on stopping the watermaker using the Flush button later). But if you press and hold the On/Off button you will cycle through a series of 3 flashes: One, Two and Three. Releasing the On/Off button after either the One, Two or Three series of flashes will automatically run the watermaker for that corresponding number of hours and then will shut the unit down with a freshwater flush.
So for example, if you want to make 16 gallons of water from the 8GPH ZEN30, you can activate the two-hour run by pressing and holding the On/Off button and letting go after the two flashes. Many cruisers will use this function when they want to make a certain amount of water and have the watermaker shut itself down. We do this ourselves while motoring and taking advantage of the “free alternator power”. Automatic shutdown with an end of run freshwater flush is one less thing to worry about while working on your boat in exotic places, which experienced cruisers know is the real-world definition of Cruising.
Cheers Rich Boren aka “Cruise RO Rich” SchenkerWatermakersUSA.COM
+/- Schenker Tech Class 1: (Pressure adjustment when running your watermaker for: Sea Water, Fresh Water and Brackish Water.)
The differences between a Piston Pump watermaker and an Energy Recovery Pump watermaker come into highlight when you start talking about running your watermaker on the three possible source water streams: Sea Water, Brackish Water and Fresh Water. A Piston Pump uses a fixed back pressure valve to make the 800psi without feedback and needs to have it’s pressure manually readjusted, not just at the start and stop of each run, but also when changing water streams.
By contrast, the Energy Recovery pump self-adjusts the system pressure to achieve a set product water recovery rate (usually 10%). This means that for every 10 Gallons of water that flows through the watermaker, 1 gallon (or 10%) becomes fresh drinking water and the other 9 gallons (90%) goes overboard as brine. This self-adjusting is done via the volumetric rations of the product and brine reject streams by the Energy Recovery Pump. When you are running on pure sea water, the system self-adjusts to around 800psi to reach the set 10% recovery rate. Then when you are running on pure fresh water the pressure self-adjusts down to around 250psi to hit the 10%. Rather than setting a fixed pressure like a piston pump watermaker, the energy recovery pump sets a fixed recovery rate by the volume design of the pump cylinders and the pressure is self-adjusted up or down automatically to hit the set recovery rate. So you can be motoring through different salinity inlet water streams without worrying about damaging your RO Membrane due to “over-flowing” since the pressure will self-adjust.
This design characteristic means that energy recovery pump watermakers don’t have their production rates increase or decrease based on sea water properties like salinity and temperature. Additionally knowing this comes in handy when troubleshooting an energy recovery watermaker because by measuring the two flow rates (Product Water and Brine Water) you can check the performance of the Feed Pump and Energy Recovery Pump. When someone calls me with a problem, one of the first questions I always ask is, “what is your Product and Brine Water Flow Rates”. By adding these two flow rates together I know the Total Feed Pump Flow Rate and can calculate the Recovery Rate. For example, if you have a 30LPH watermaker (like the ZEN30) and you know it has a 10% recovery rate, then a properly working Feed Pump should be putting out a total of 300LPH with 270LPH of brine reject.
Cheers Rich Boren aka “Cruise RO Rich” SchenkerWatermakersUSA.COM